
Situation : In our daily digital interactions, the habit of right-clicking on files or folders and using the “Send to” functionality has become second nature. It’s a quick and convenient way to manage our digital files. However, a common frustration arises when we want to save those files to a specific location. The typical process involves opening that location manually, leading to a time-consuming and often frustrating experience.
The good news is, there’s a simple solution to streamline this process and make file organization more efficient. By customizing the “Send to” option, you can add specific location paths, eliminating the need to navigate through folders manually every time you want to save a file in a particular location.
Task: Creating a Path on the E Drive and Customizing “Send To”
The task involves creating a designated path on the E drive and customizing the “Send to” option to include this path. This way, whenever you right-click on a file, you’ll have the option to send it directly to your specified location.
Action: Practical Implementation with Various Files
Let’s break down the steps:
- Create a Path on E Drive:
- Open File Explorer.
- Navigate to the E drive.
- Right-click and choose “New” > “Folder.”
- Give your folder a name. [My C drive Data]
- Right Click on folder create a shortcut
- Cut the shortcut you’ve just created.
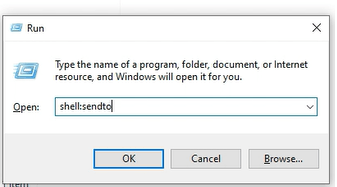
- Open the “Run” dialog by pressing Win + R.
- Type shell:sendto and press Enter.
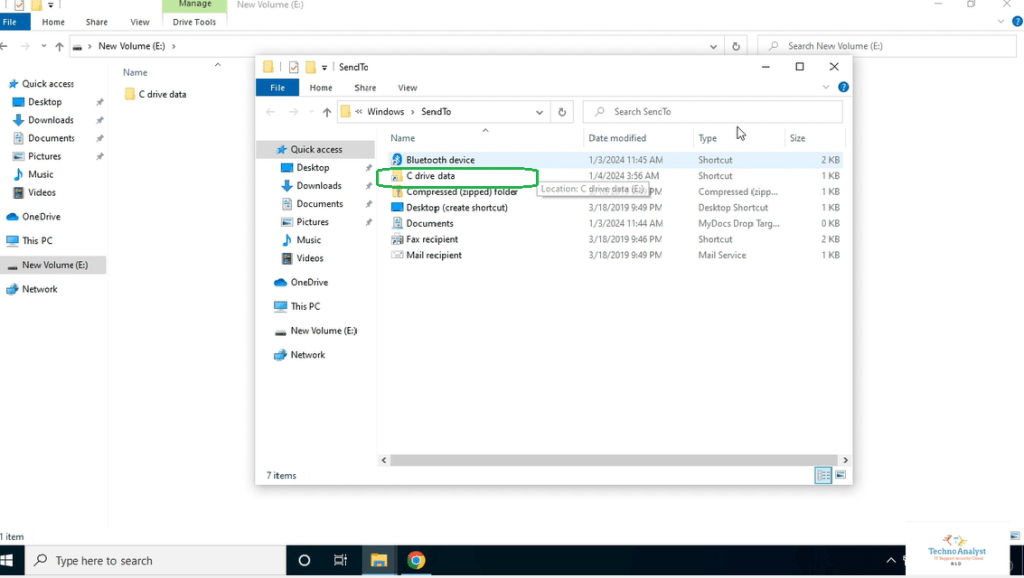
- Paste the shortcut into this “SendTo” folder.
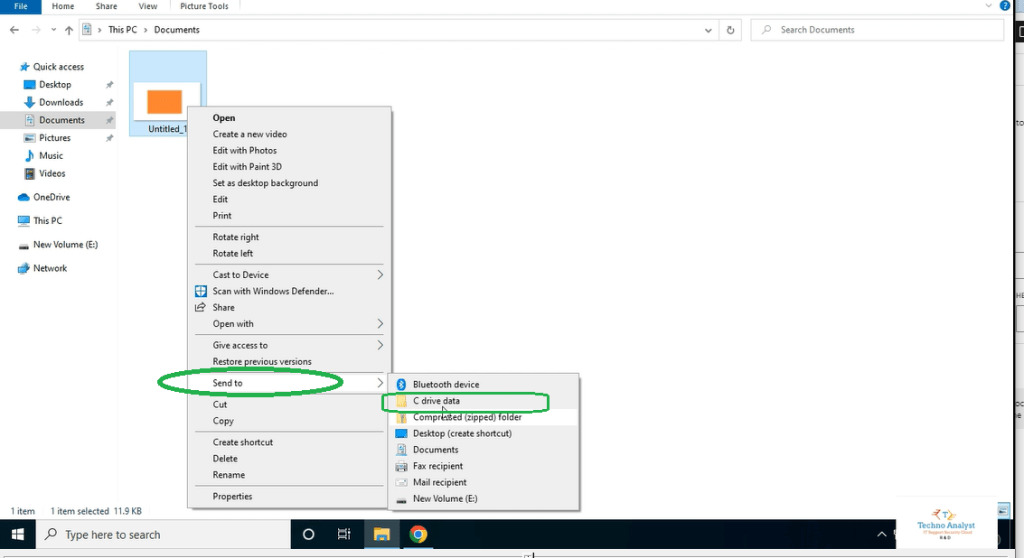
- Done . Now Right click any folder
- click on send to and select - My C drive data
- all Data will save in E:\My C drive data path .
Result: Streamlined File Management in E Drive
The result is a customized “Send to” option that includes your specified location. To showcase this, let’s practically implement the process by adding images and files check out below link .

Leave a comment